Monday, 28 January 2013

Flourless Peanut Butter Cookies

I love homemade cookies. They are probably one of my favorite means of indulgence. I also love cookies that are really easy to make. The less ingredients involved, the better.

Flourless Peanut Butter Cookies

Yields: 18 cookies

Ingredients:

1 C natural peanut butter (crunchy or smooth, doesn't matter)
2/3 C sugar
1 large egg
1 t vanilla

Directions:

Preheat oven to 350 degrees. Line baking sheet with parchment paper.

Cream together peanut butter and sugar until well blended. Add egg and vanilla, mix well. If dough is too soft, place in refrigerator for 1 hour.

Scoop and form dough into balls. Place on baking sheet 1 1/2 inches to 2 inches apart, flatten slightly with a fork.

Bake 10 minutes. Remove from oven, let cool 5 minutes, then transfer cookies to wire rack to finish cooling.

*Add 1/3 C chocolate chips


Enjoy and Bon Appetit!

Friday, 25 January 2013

Broccoli Cheese Soup

I love soup. Homemade soup is always better than store bought, you would be shocked at what chemicals and preservatives go into condensed soup! My all time favorite soup is Broccoli Cheese... oh man, it is so good. I've been using this recipe for broccoli cheese soup for the past several months and it is devine. I could eat the whole pot by myself! Try this recipe next time you are craving broccoli cheese soup, it should convert you from the canned brand!

Broccoli Cheese Soup

Yields: 4-6 servings

Ingredients:

1 3/4 C low sodium chicken broth
1 small onion or shallot, diced
1/3 C all-purpose flour
4 T butter
2 C milk
1 1/2 C shredded cheese blend: Mild/Medium/Old cheddar, Swiss, Monterey Jack, etc. (I use old Cheddar and Monterey Jack)
3 C chopped, lightly blanched broccoli

Directions:

Blanch broccoli pieces by submerging them in boiling water for 3-4 minutes. Set aside.

In a small saucepan, bring chicken broth and diced onion to a simmer over medium heat, set aside.

In separate stock pot, melt butter. Add flour, salt and pepper, stirring vigrously for 2 minutes. Slowly whisk in milk, this will create a roux. Whisk constantly until roux begins to thicken, about 5 minutes. Add warmed chicken broth and continue to whisk until mixture is well blended.

Add cheese and stir until completely melted. Add in blanched broccoli. If you want the mixture to be thinner, add more chicken broth and stir until the consistency is to your liking. If the soup is too thin, continue to simmer and mixture will thicken.

Serve hot, garnish with croutons and a bit more shredded cheese!

*Optional* Blend finished soup until smooth using a handheld blender, or standard blender (IF you use a standard blender, wait until mixture has cooled completely).
*Try cutting off the top and scooping out the middle of a large bread roll and ladle soup into the bread for a delicious bread bowl.


Enjoy and Bon Appetit!

Thursday, 24 January 2013

Jalapeño Poppers

I love jalapeño poppers! They are great for appetizers, parties, snacks, or even as a side dish. I made this recipe last night with chicken and a simple, homemade coleslaw. They were delicious! They are oven-baked, not fried, so they won't make you feel heavy and gross like some fried foods will. They are well-flavored and have just the right kick of spice to bring out the classic taste of a beloved jalapeño popper. Try these soon, you will be glad you did!

Jalapeño Poppers

Yields: 24 poppers

Ingredients:

12 fresh jalapeño peppers, halved lengthwise, whites and seeds removed (you may want to use gloves for this part, or avoid touching your eyes after removing the insides...)
4 T low fat cream cheese (regular fat cream cheese will work just as well)
3 scallions, diced
3oz shredded cheddar cheese
3oz shredded jalapeño or plain monterey jack cheese
1/2 C panko bread crumbs
1/2 T pepper
1/2 T garlic powder
1/2 T onion powder
1/8 t cayenne pepper
3 eggs, beaten

Directions:

Preheat oven to 400 degrees, line baking sheet with parchment paper, or spray with vegetable oil cooking spray.

Make sure you remove all the seeds and white insides from the jalapeños, unless you want them SUPER spicy.

In a medium mixing bowl, mix spices and bread crumbs together, set aside.

In a separate bowl, beat eggs until smooth, set aside.

In a third bowl, mix together cream cheese, scallions and shredded cheeses. Spoon and spread filling into halved peppers. Dip stuffed peppers into eggs, then dip into bread crumb mixture, making sure to coat peppers well.

Place finished peppers onto baking sheet, bake in preheated oven for 20-25 minutes until golden brown and cheese is bubbly.

Serve immediately!


Enjoy and Bon Appetit!

Wednesday, 23 January 2013

Tasty Roast Beef with Garlic Mashed Potatoes

I try to use my crockpot at least once a week. Yesterday I decided to make a classic dinner: Roast Beef and Mashed Potatoes. The roast beef is cooked slowly in the crockpot with a balsamic-flavored sauce that transforms into a wonderful au jus. I also had to add roast garlic to our mashed potatoes because... well roast garlic speaks for itself. The beef is well flavored but not too strong that you couldn't use it for other recipes, such as: Beef Dip, Beef Tacos, Burritos, etc. All I can say about this recipe is YUM!

Tasty Roast Beef with Garlic Mashed Potatoes

Yields: 4 servings

Ingredients:

1 1lb boneless Beef Roast

1/2 C low sodium beef broth
1/2 C balsamic vinegar
1/2 T Worcestershire (pronounced: WOO-ster-Sheer) sauce
1/2 T soy sauce
1/2 T honey
Pinch red pepper flakes
4 cloves garlic (I forgot to add this yesterday, but it didn't make much of a difference)

2lb baby potatoes
1/2 C milk
4oz shredded cheddar cheese
1 head roasted garlic
2-4 T butter or margarine

Directions:

For the Beef: Place roast in crock pot. In a medium bowl, mix together: beef broth, balsamic vinegar, worcestershire, soy sauce, honey, pepper flakes and garlic. Pour over roast. Cook low 6-8 hours (or on high 4-6 hours). Shred beef with two forks and keep warm until you are ready to serve.

For the Potatoes: Preheat oven to 400 degrees. Chop the top of 1 head of garlic so that the tops of the cloves are exposed. Drizzle with 1 t olive oil and sprinkle with salt and pepper. Wrap in tin foil and bake in preheated oven for 40-60 minutes. Allow garlic to cool, then squeeze garlic out of the skin.

In large stock pot, cover potatoes with at least 2" water. Bring to a boil. Let boil 20-30 minutes until potatoes are fork-tender. Drain and return potatoes to pot.

Add milk, roasted garlic (all of it), and butter. Mash potatoes until smooth. Add cheddar cheese and mix.

Serve with Roast Beef and your favorite vegetable side dish.


*When garlic is roasted it brings out a beautifully fragrant, sweet flavor to it. Add roasted garlic to pasta, salad, vegetable dish, or spread plain onto French bread for a wonderful treat
*The garlic flavor will improve the longer you let the potatoes sit. The garlic flavor will be more pronounced in leftovers (if you have any!)
*Try adding the Beef au jus to a small sauce pot. Bring to a boil and simmer 20 minutes, or until mixture is reduced by half. This would be an excellent gravy for the beef and potatoes!
*This recipe can easily be doubled: Use a 3-4lb roast and double the rest of the ingredients


Enjoy and Bon Appetit!

Tuesday, 22 January 2013

(Vegetarian) Black Bean Chili

I have never been shy about my love for meat. However, sometimes it is nice (and necessary) to incorporate vegetarian options into your meal plan. There is one particular vegetarian recipe my mom used to make when I was younger - Black Bean Chili! I used to be much more picky about food when I was young, so I didn't actually like this recipe until I got a bit older. Now I love it! Full of protein from black beans and full of flavor from the seasoning. Try this recipe next time you want to warm up with some chili!

(Vegetarian) Black Bean Chili

Yields: 10 servings

Ingredients:

2 14oz cans black beans (or use dry beans soaked overnight)
1 28oz can diced tomato
2 red peppers, diced
1/2 onion, diced
1 head garlic, minced

1/4 C chili powder
1 T unsweetened cocoa powder*
2 t cumin
1 T oregano

Directions:

Saute onion, garlic and peppers over medium-high heat in large stock pot. Mix chili powder, cocoa powder, cumin and oregano in a small bowl. Add seasoning to skillet. Saute to allow flavors to incorporate.

Add beans and tomato to pot, stir well and bring to a low boil. Simmer over medium-low heat until heated through, or up to 2 hours. The longer you simmer this chili, the better the flavor will be!

Serve hot with a small dollop of low-fat sour cream and some shredded cheddar cheese.

*Adding cocoa powder to stews and chilis will enhance the richness, flavor and color to the dish
*Try adding diced or shredded carrot to your chili for some extra veggies. Also, try 1 can kidney beans instead of black beans
*This is a good recipe to make in large batches since it freezes exceptionally well. Freeze in airtight containers for 3-6 months


Enjoy and Bon Appetit!

Monday, 21 January 2013

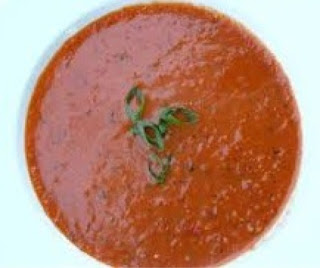
Roast Tomato Soup

I really do not like tomatoes. I love tomato-based recipes (tomato sauce, chili, tomato soup, etc), but I cannot stand plain or chunky tomatoes. The problem with that is tomatoes are a superfood! They help lower cholesterol and they help fight cancer. Sometimes I can struggle to incorporate tomatoes into my diet, so I have been looking for a good Roast Tomato Soup recipe and I think I found it!

*Tomatoes are in season between July and August but I didn't want to wait that long to try this!

Roast Tomato Soup

Yields: 6-8 cups

Ingredients:

16 Roma tomatoes, tops and seeds removed
1 Red pepper, seeds removed
8 strips fresh Basil
5 cloves garlic, peeled
1 onion, chopped
1 L low-sodium chicken broth - or use vegetable broth for a vegetarian option
Pepper, to taste
2 T tomato paste (we added this for thickness and a richer "tomato" flavor)
Olive oil

Directions:

Preheat oven to 300 degrees.

Cut tomatoes into halves, cut peppers into thick slices. Place onto baking sheet with peeled garlic and chopped onion. Drizzle with olive oil and season with pepper.

Place in oven and roast 1 1/2 to 2 hours, check after 1 hour to make sure they aren't burning.

When tomatoes, peppers, garlic and onion are finished roasting, add to large stock pot. Add 1 L low-sodium chicken or vegetable broth, basil, pepper, and tomato paste. Using a handheld blender, blend until smooth.

Bring soup to a light boil over medium heat. Serve hot and garnish with low-fat sour cream, basil and croutons. Or serve with a grilled cheese sandwich.

*This soup would also be beautiful when chilled (gazpacho), especially if served with a shot of vodka (say hello to a home-made Caesar!)


Enjoy and Bon Appetit!

Friday, 18 January 2013

Chicken Parmigiana

A lot of people mistake Parmigiano-Reggiano for plain ol' Parmesan. While there is nothing wrong with Parmesan, there is a difference between the two cheeses. Parmigiano-Reggiano is specific in its recipe and where it is made (only cheese produced in certain areas of Italy can be labeled as Parmigiano-Reggiano). Most people assume that Parmesan is the English word for Parmigiano-Reggiano, but it's not. Usually, a cheese labeled "Parmesan" is not made in Italy. Other similar cheeses would include; Pecorino Romano, Grana Padano, and Asiago.

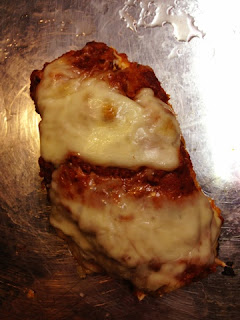
Last night I made Chicken Parmigiana and it was definitely a hit in our house. This recipe is easy and delicious.

Chicken Parmigiana

Yields: 4 servings

Ingredients:

4 boneless, skinless chicken breasts
1/4 C bread crumbs
1/4 C Parmigiano-Reggiano (or parmesan if you have it on-hand)
Butter, melted (or use olive oil, like I did)
4 slices Mozzarella
1/2 C Marinara sauce

Directions:

Preheat oven to 425 degrees. Line baking sheet with tin foil or spray with cooking spray.

In a shallow bowl or plate, mix together bread crumbs and Parmigiano-Reggiano. Set aside.

Place chicken breasts between two sheets of plastic wrap. Flatten chicken with a heavy object to about 1/2 inch thickness. Season both sides of chicken with salt and pepper.

Brush both sides of chicken with melted butter or olive oil. Dip chicken into bread crumb mixture and coat both sides. Sprinkle tops with extra breading.

Bake 20 minutes. Top each chicken breast with 2 T Marinara sauce and top with 1 slice Mozzarella cheese. Bake additional 5-10 minutes until mozzarella has melted.

Serve with pasta, baked spaghetti squash or roast potatoes.


Enjoy and Bon Appetit!

Thursday, 17 January 2013

Ginger Molasses Cookies

Ginger molasses cookies are delicious. Some people prefer them to be crunchy, others prefer them to be soft (I am pro-soft). These cookies can be enjoyed any time of the year, any time of day and are best when dunked into a steaming hot cup of tea.

Ginger Molasses Cookies

Yields: 24 OR 12 large cookies

Ingredients:

2 1/4 C all purpose flour
2 t baking soda
1/4 t salt
1 t ground cinnamon
1/2 t ground clove
1/2 t allspice
1 t ground ginger (you may want to add 1/2 to 1 extra t if you prefer a stronger ginger flavor)

3/4 C unsalted butter, softened
1 C brown sugar
1 large egg
1/4 C unsulphured molasses
Granulated sugar, for coating cookie dough

Directions:

Preheat oven to 375 degrees. Place rack in centre of the oven. Line 2 baking sheets with parchment paper, set aside.

Sift flour, baking soda, salt, cinnamon, clove, allspice and ginger in medium bowl. Set aside.

Cream butter and brown sugar in a large mixing bowl until light and fluffy. With mixer on medium speed, beat in the egg and molasses, then increase speed and beat 1 minute longer, until mixture no longer appears curdled.

Mix dry ingredients into wet ingredients on low speed, mix well. The dough will seem relatively stiff. Place granulated sugar on small plate or saucer. Using a 1/4 C ice cream scoop, form dough into balls with your hands. Roll dough balls in sugar, place sugared balls onto prepared baking sheet. Be sure to space the cookies out well as they will spread quite a bit.

Dampen fingers and press down lightly on each cookie. Bake 10-12 minutes, rotate baking sheet 180 degrees halfway through baking time. Remove from oven, allow to cool on wire rack.

*This dough can be frozen for slice and bake cookies. Roll dough into a log approximately 2 1/2 inches thick, wrap in plastic wrap and then in foil. Store dough in freezer up to 6 months.
*Adjust baking time if you prefer crunchier cookies. Edges should appear firm.


Enjoy and Bon Appetit!

Wednesday, 16 January 2013

Pan Seared Pork Medallions with Balsamic Glaze

Sometimes a recipe that seems "fancy" isn't always as complicated as one might assume. Pork medallions are a specific cut of pork, they can be cut from pork steaks or pork tenderloin. Ask your butcher to cut your pork into medallions so you don't have to do it at home. A balsamic reduction (or glaze) is a versatile culinary tool. Use it over meat, in salads, over fruit or vegetables to sweeten and heighten the flavor of a recipe of your choosing.

Pan Seared Pork Medallions with Balsamic Glaze

Yields: 4 servings

Ingredients:

1-1 1/2 lb pork tenderloin, sliced into medallions

(yields 1 C glaze)
2 C balsamic vinegar (the better quality vinegar, the better the flavor)
1/4-1/2 C brown sugar (depending on your desired sweetness)

Directions:

In a small saucepan, mix balsamic vinegar and brown sugar over medium heat. Stir constantly until sugar is completely dissolved. Bring mixture to a boil, reduce heat and simmer on low until glaze has reduced by half (approximately 20 minutes). Mixture should be able to coat the back of a spoon. Set aside, or pour into resealable jar for another time.

Heat large skillet over medium-high heat. Brush both sides of pork medallions with olive oil (omit this step if using a non-stick skillet). Once pan is hot, sear medallions 3 minutes on each side. Turn round sides of medallions in pan, about 1 or 2 minutes, to brown. Transfer to cutting board, let rest 5 minutes.

Serve medallions with steamed or roasted vegetables, quinoa salad or other favorite side dish. Garnish medallions with balsamic glaze. Serve hot!

*Try using raspberry vinegar or red wine vinegar for a different flavored glaze. You can also substitute brown sugar for agave, honey, or molasses.


Enjoy and Bon Appetit!

Tuesday, 15 January 2013

Thai Coconut Chicken Soup

Autumn and Winter are perfect seasons to experiment with different soup recipes. I really love soup and stew! It is so easy to make a huge batch and freeze lunch or snack size quanitities. Soup can be refreshing, it can be rich, it can be creamy or spicy, but soup can always be satisfying. What better way to keep warm than to indulge in a huge, steaming bowl of soup?

That Coconut Chicken Soup is one of my all-time favorite soups. The recipe I'm posting today is made in the crockpot. One of the reasons why I love my crockpot (besides how easy they are to use) is the smell of a delicious meal that has been cooking all day. I will definitely be making this soup again this weekend, maybe you will, too!

Thai Coconut Chicken Soup

Yields: 8 servings

Ingredients:

1L low-sodium chicken broth
2-3 boneless, skinless chicken breasts, cubed
2 C carrots, sliced diagonally (about 3 large)
1/2 large onion, diced
1 T fresh grated ginger
2 cloves garlic, minced
2 T lemongrass, minced
pinch red pepper flakes
1 red bell pepper, diced
1 can light coconut milk
1-2 T Thai curry paste (found in the ethnic food aisle, it is a red colored paste)

Directions:

Add the following ingredients to your crockpot: chicken broth, chicken breasts, carrots, onion, ginger, garlic, lemongrass and red pepper flakes. Cook on low 6-8 hours.

15-30 minutes before serving: Add bell pepper, coconut milk and curry paste. Let stand at least 15 minutes in hot crockpot. Serve hot, garnish with peanuts, fresh cilantro and a squeeze of lime juice.

*Adding the bell pepper at the end will keep them from getting soggy and soft. The slight crunch of the pepper will be refreshing
*Add more curry paste, or sriracha sauce if you like your soup extra spicy


Enjoy and Bon Appetit!

Monday, 14 January 2013

Cheesecake Attempt #1

There is absolutely nothing healthy about cheesecake, but that didn't stop me from baking one for the first time this past weekend. Chad's birthday was Sunday, so I had a perfect excuse to make one. I have never baked a cheesecake before, so I followed this recipe exactly. I did not make the blueberry topping, I simply ran out of time, but I think it would go beautifully with the flavor of the cheesecake.

My wonderful younger brother, Gabriel, bought me a brand new spring-form pan for Christmas and I found out that making a cheesecake is a lot more involved than I'd thought. The flavor was delicious, cream cheese adds the richness and sour cream adds the tartness this cake needs to cut the sweetness, especially if you add the topping. The one issue I had was my electric mixer is broken, so I had to mix it by hand; bad idea if you want points on presentation. The best part about this is that I have a lot of room to improve on my next attempt:

Classic Cheesecake (attempt #1)

Yields: 8-10 servings

Ingredients:

Vegetable oil cooking spray
6 T unsalted butter, melted
2 C graham crackers, crushed
3 T granulated sugar
1/4 t ground cinnamon
pinch of salt

16oz cream cheese, room temperature (very important that it is room temperature!)
16oz sour cream
1 C granulated sugar (I actually cut the sugar by 1/3 C)
3 large eggs
1 1/2 t grated lemon zest
1 t vanilla extract
Boiling water, for roasting pan

Blueberry topping *Optional, recipe included in original post on marthastewart.com

Directions:

Preheat oven to 325 degrees. Coat 9 inch springform pan with cooking spray. Wrap exterior of pan with aluminum foil (including base of pan).

Stir together butter, graham cracker crubs, sugar, cinnamon and salt. Press mixture firmly into bottom of pan. Refrigerate 15 minutes.

In large mixing bowl, beat cream cheese with electric mixer on medium speed until light and fluffy. Reduce speed to low, add sour cream, sugar, eggs, lemon zest and vanilla. Beat until well combined and smooth, but do not overmix. Pour into chilled crust.

Set springform pan in large, shallow roasting pan. Place in oven. Carefully ladle boiling water into roasting pan, enough to come up 3" on the sides of the pan. Bake until cheesecake is set but wobbly just in the center. *I baked my cheesecake for 1 hour and 15 minutes, then turned the oven off and left cheesecake in the oven for an additional hour. It turned out perfect!

Remove from oven, refrigerate uncovered for at least 8 hours (overnight is better).

Run a sharp knife around edge of cheesecake, unmold and spoon desired topping over cake, or serve plain.


Enjoy and Bon Appetit!

Friday, 11 January 2013

Simple Garlic Sesame Noodles

A lot of work can go into creating a full production with a main entree, side dishes and appetizers, and it can be fun to experiment and make a variety of dishes for one meal. However, sometimes all you really need is a quick snack. Something easy and satisfying. There are hundreds of recipes for snacks and side dishes that don't need a lot of preparation. Featured in today's post is one of those recipes. Simple garlic sesame noodles are simple to prepare and are a great option for a quick afternoon or midnight snack, or serve them with teriyaki or honey glazed chicken wings!

Simple Garlic Sesame Noodles

Yields: 4 servings

Ingredients:

12oz angel hair, spaghettini, or other thin pasta
1/4 C low sodium soy sauce
3-4 cloves garlic, minced
3 T sugar
2 T rice vinegar
2-3 T sesame oil
1/2 t hot chili oil (or Sriracha sauce, find it in the ethnic food aisle)
4-5 T canola oil
2 T hot water

Directions:

Cook pasta according to package instructions. Set aside.

In small bowl whisk together soy sauce, garlic, sugar, rice vinegar, sesame oil, hot chili oil/sriracha sauce, canola oil and hot water.

In large bowl, add cooked pasta and sauce mixture. Toss to coat. Garnish with sliced scallions and hot chili flakes. Serve hot or cold as they are for a quick snack, or as a side dish!


Enjoy and Bon Appetit!

Thursday, 10 January 2013

Chocolate Zucchini Muffins

I love food that is easy to grab on my way out the door. I do a lot more baking on the weekends than any other day. Simply because it saves time during the week when I need to put a quick breakfast or lunch together.

Zucchini Muffins are a healthy alternative for muffins or scones you buy from ANY bakery or fast food chain. For example: McDonald's blueberry muffins, weigh in at 121 grams and pack a whopping 410 calories and 15g of fat. Compare that to the Chocolate Zucchini Muffins in this post at 213.7 calories and 11g of fat per muffin. Sounds like a good trade to me, especially when I'm craving a good muffin in the morning!

Chocolate Zucchini Muffins

Yields: 12 muffins

Ingredients:

1 large zucchini, grated (leave peel and seeds intact)

1 1/2 C all-purpose flour (or use your favorite gluten-free all-purpose flour blend)
1 t baking soda
1 t baking powder
1/2 t ground cinnamon
1/4 t ground nutmeg
1/2 C brown sugar
1/2 C unsweetened cocoa powder

2 large eggs
1/2 C vegetable or olive oil
1 t vanilla extract
1/4 t salt

*Optional*
1/4 C dried cranberries
1/4 C chopped walnuts
1/4 C dried currants

Directions:

Preheat oven to 350 degrees.

Wash and grate zucchini.

Brush muffin tin (or 9x5 loaf pan) with oil.

In large mixing bowl; add flour, cocoa powder, baking soda, baking powder, cinnamon and nutmeg. Whisk to blend well.

In separate bowl, add eggs and beat until frothy. Add sugar, oil, vanilla and salt to eggs. Mix well.

Add dry ingredients to the wet ingredients, mix well.

Fold in grated zucchini. Zucchini will shed a lot of water, do NOT discard, add to the batter, then fold in cranberries, walnuts and currants.

Pour batter into prepared muffin tin. Bake on center rack of your oven for 35-40 minutes, until a toothpick inserted comes out clean.

Let cool on wire rack for 5-10 minutes.

*Bake time will require adjustment according to size/shape of your pan


Enjoy and Bon Appetit!

Wednesday, 9 January 2013

Skinny(er) Broccoli Chicken Alfredo

I absolutely love pasta. I love bolognese, alfredo, carbonara... you name it. A common problem with pasta dishes is that they can be high in calories and fat, not to mention carbohydrates. If you are looking for a lighter version of an alfredo recipe, take a look at this:

Skinny(er) Broccoli Chicken Alfredo

Yields: 4 servings

Ingredients:

3 boneless, skinless chicken breasts, cooked to your liking
2 C steamed or roasted broccoli florets
8oz fettuccini
2 T extra virgin olive oil
2 T all-purpose flour
3 cloves garlic, minced
1 C low sodium chicken broth
1/4 C plain, 0% greek yogurt
1/4 C skim milk
1/4 t pepper
dash ground nutmeg
3/4 C grated parmesan cheese

Directions:

What I do for my chicken in this recipe - mix together the following spices: 1/2 t chili powder, 1/4 t cumin, 1/4 t ground coriander, 1/4 t pepper, 1/8 t cinnamon, 2 t salt. Rub spice mixture into chicken breasts. Heat a large oven proof skillet to medium-high heat. Add 2 T olive oil to hot pan and sear chicken breasts 5 minutes each side. Do not move the chicken for 5 minutes. Transfer pan to oven, preheated to 425 degrees. Roast chicken breasts 25-30 minutes until cooked through. Let rest 5 minutes before slicing.

In a pot of boiling, salted water, cook pasta according to package instructions. Drain and set aside.

In medium sauce pan, heat olive oil over medium-high heat. Add garlic and cook 2 minutes. Whisk in flour and cook until smooth. Gradually whisk in chicken broth, greek yogurt, milk, pepper & nutmeg. Bring to a low boil, stirring constantly. Lower heat and simmer, stirring gently, until mixture thickens (about 3 minutes). Stir in 3/4 C parmesan.

Add cooked chicken and roasted/steamed broccoli to sauce mixture. Add cooked pasta and toss to coat. Garnish with fresh parsley.


*Use cooked spaghetti squash or julienned zucchini (sauteed or steamed) for a much lighter option.

Enjoy and Bon Appetit!

Tuesday, 8 January 2013

Dark-Chocolate-White-Chocolate-Cranberry-Pecan Cookies (made with Olive Oil)

Everyone loves a good chocolate chip cookie, unless you're crazy. There are thousands of recipes for chocolate chip cookies, but my favorite of all time have more than just chocolate chips... Dark chocolate, white chocolate, dried cranberries and pecans take this classic cookie up a notch. They're also made with whole wheat flour and extra virgin olive oil instead of butter, therefore cutting down on saturated fats YAY!Try this recipe the next time you crave a chewy chocoalte chip cookie, I promise you will not be disappointed:

Dark-Chocolate-White-Chocolate-Cranberry-Pecan Cookies

Yields: 2 dozen

Ingredients:

2 1/4 C whole wheat flour
1 t salt
1 t baking soda
2 large eggs
1/4 C extra virgin olive oil
3/4 C white sugar
3/4 C brown sugar
1 t vanilla extract
1/2 C dark chocolate baking wafers, chopped
1/2 C white chocolate baking wafers, chopped
1/2 C dried cranberries
1/2 C pecans, chopped

Directions:

Preheat oven to 350 degrees. Line a baking sheet with parchment paper.

Sift flour, baking soda, and salt in a large bowl. Set aside.

In a large mixing bowl, beat eggs until frothy. Add olive oil and vanilla and beat until completely mixed. Add sugars and mix thoroughly.

Slowly add in flour mixture to wet ingredients (add approx. 1/2 C at a time) and mix with a spatula. Continue adding flour mixutre to wet ingredients until all the flour is incorporated. Fold in chocolate, white chocolate, cranberries and chopped pecans.

Using an ice cream scoop (or large spoon), roll into 1 1/2 - 2 T sized balls. Place 1" apart on parchment lined baking sheet. Flatten the tops slightly with a fork.

Bake 12-15 minutes until golden brown. Cookies will be soft and will look undercooked. Unless you want crunchy cookies, remove baking sheet from the oven. Allow to cool 5 minutes, then transfer to wire cooling rack to finish cooling.

Serve fresh and warm out of the oven with a tall glass of ice cold milk.


Enjoy and Bon Appetit!

Monday, 7 January 2013

Butternut-Apple Curry Soup

I spend time with my Mom at least once a week, on average. This past Saturday she asked me to invent a soup using butternut squash, and a granny smith apple... I was a little nervous, as any person might be if they were asked to create a recipe with 2 known ingredients. That being said, this is what we came up with:

Butternut-Apple Curry Soup

Yields: 10, 1 C servings

Ingredients:

1 large butternut squash, peeled, seeded and cubed
1 Granny Smith apple, cored and sliced
1 L low-sodium chicken broth
1 large onion, diced
1 T extra virgin olive oil
1 T butter, optional

1 t cumin
1 t garam marsala
1/2 t ground ginger (1 t fresh, grated ginger would be nice, too)
1/2 t turmeric
1/4 t black pepper

Directions:

In a large stock pot, bring cubed butternut squash; sliced apple and chicken broth to a boil.

In small skillet, saute onion in olive oil and butter. Add spices and heat through.

Add spiced onions to stock pot. Reduce heat and simmer until squash and apple are soft.

Remove pot from heat. Use a handheld blender and blend soup until smooth. If you do not have a handheld blender, wait for soup to cool and then use a regular blender to blitz soup until smooth. DO NOT try to blend hot soup in a regular blender! Add black pepper, to taste, and serve hot.


*The spices we used are typically used in Indian recipes.
*Turmeric is known for adding color to dishes and its health benefits, click the link to learn 20 health benefits from this spice

Enjoy and Bon Appetit!

Mexican Crockpot Chicken

If there is one secret I have never kept, it would be my love for crockpots. There is nothing better than coming home after a long, stressful day and walking into a house filled with the delicious scent of a homecooked meal, especially when that homecooked meal has virtually cooked itself! Crockpots are inexpensive, very low maintenance and easy to clean. They can be a great gift for loved ones at Christmastime, birthdays or housewarming parties.

Yesterday, I made my recipe for Mexican Chicken in the crockpot. I've made it several times and it's always a hit. You can use the chicken and sauce for tacos, enchiladas, or spoon it over rice/pasta for an easy, satisfying meal:

Mexican Crockpot Chicken

Yields: 6 servings

Ingredients:

3-4 whole boneless, skinless chicken breasts
1 16oz can tomatoes, green peppers & onions
1/4 C taco sauce, or use hot salsa
1/2 C low fat sour cream (optional)

2 1/2 t chili powder
2 t cumin
1/2 t onion powder
1/2 t garlic powder
1 t paprika
1/2 t pepper
1/2 t salt

Directions:

Place chicken breasts in crock pot. Then add tomato/peppers/onions, taco sauce, and spices. Cook on low 6-8 hours or on high 4-6 hours.

Shred chicken and mix with sauce. Add sour cream and mix together. Use chicken mixture for tacos, enchiladas, or serve hot over rice or pasta.


Enjoy and Bon Appetit!

Friday, 4 January 2013

Brussels Sprouts and Melt in Your Mouth Chicken

I generally prepare healthy meals, but everyone needs to indulge once in a while, and the holidays are a perfect time to do so. Well, now that the holidays are a thing of the past, it is time to start getting back on track when it comes to eating more healthfully. Everyone knows that lean protein, low carbs and lots of veggies are a great way to start off on the right track. It's important to listen to your body, especially when it craves healthy foods, and that is just what I did last night; I had a hankering for brussels sprouts and chicken breast:

Brussels Sprouts and Melt in Your Mouth Chicken

Yields: 4 servings

Ingredients:

4 chicken breasts (boneless, skinless)
1 C low fat greek yogurt (my favorite brand is Krema greek plain 1%)
1/2 C shredded parmesan
1/2 t garlic powder
1/2 t pepper
1/2 t onion powder
1/2 t poultry seasoning (Szeged chicken rub in the green can is my all-time favorite)

2-4 C Brussels sprouts, stems removed, chopped
2 T Olive oil
Pinch of the following:
salt
pepper
garlic powder
poultry seasoning

Directions:

Preheat oven to 375 degrees.

In a small mixing bowl, combine yogurt, parmesan, garlic powder, pepper, onion powder, and poultry seasoning; mix well.

Season both sides of chicken breasts with salt and pepper. Place chicken on foil lined baking sheet, spread yogurt mixture over top of each breast. Place chicken in the oven, bake 40 minutes, broil 5 minutes. Remove from baking sheet and let stand 5 minutes.

Meanwhile, in a mixing bowl, toss brussels sprouts with seasonings and 1 T olive oil. Heat 1 T olive oil in large skillet over medium heat. Once skillet is hot, transfer brussels sprouts to pan and saute 10-15 minutes until sprouts are slightly browned on the outside and soft and slightly crisp in the middle. Add extra seasoning to sprouts if necessary, transfer to a serving dish with the finished chicken breast.

*Try adding bacon bits to your brussels sprouts! Chop 3-4 slices of bacon into tiny bits, cook in skillet until fat begins to register, then transfer seasoned brussels sprouts to the pan.
*Adding chopped pecans to brussels sprouts is also a good addition to a delicious side dish.
*This recipe can easily be halved if you are cooking for 2. Or use leftovers for lunch the next day.


Enjoy and Bon Appetit!

Thursday, 3 January 2013

Pumpkin Spice Bread with Ginger and Walnuts

I made this delicious loaf for my Mom at Christmas. It is hearty with warm flavors of spice, sweetness from crystallized ginger and a rich meaty texture from the walnuts. Did I mention it's also gluten-free? My mom has a gluten allergy and this Pumpkin Spice Bread is perfect for people that cannot digest gluten:

Pumpkin Spice Bread with Ginger and Walnuts

Yields: 1 loaf

Ingredients:

2 large eggs
3/4 C brown sugar
1/3 C extra virgin olive oil
1 t vanilla extract
1 C pureed pumpkin
1/4 milk

1 1/2 to 2 C gluten-free all-purpose flour blend
1 t baking soda
1 1/2 t baking powder
1/2 t salt
1 t ground cinnamon
1/2 t ground nutmeg
1/4 t ground clove

1/2 C crystallized ginger, chopped; reserve 2 T for topping
1/2 C walnuts, chopped; reserve 2 T for topping.

Directions:

Preheat oven to 350 degrees. Grease and flour a 9x5 loaf pan.

Sift the dry ingredients: flour, spices, salt, baking soda and baking powder) in a bowl. Set aside.

In a large mixing bowl, beat eggs and sugar until well combined and texture is fluffy. Add olive oil, pumpkin, milk and vanilla extract. Mix until well combined.

Add dry ingredients to the wet ingredients in 1/2 C intervals and mix until well blended. Once you've mixed all of the dry ingredients to the wet ingredients, add in the extra 1/2 C if the batter seems too runny.

Fold in crystallized ginger and walnuts to the batter. Pour batter into prepared loaf pan and sprinkle the top with remaining ginger and walnuts. Place in center rack of the oven and bake 60 minutes, until a toothpick or knife inserted comes out clean. Allow to cool in the pan for 30 minutes, then turn bread out onto a wire rack to finish cooling. Slice and serve warm with a touch of butter and a cuppa tea!

*We baked our loaf in a convection oven at 350 for exactly 60 minutes. This loaf will rise quite a bit.
*If you want to make this loaf Vegan: substitute eggs for an egg replacement and the milk for almond milk!


Enjoy and Bon Appetit!

Flourless Fudge Brownies

Right now (almost) everyone is in a panic, trying to detox their bodies from the abundance of over-indulgence after the holidays, but there is one more treat you need to try ASAP! because if you don't try them now, you will kick yourself when you finally do.

These brownies are rich, soft and oh-so-chocolatey. I am one of those people who believe that brownies should have a BROWNIE consistency, rather than a cakey, fluffy texture - these... are those brownies.

You can easily personalize this recipe with a few optional ingredients, i.e. different flavored extracts, different mixin's and/or different toppings. Below, I will feature the exact recipe I used for these incredible brownies, which also includes a recipe for a delicious (and super easy) Peppermint Buttercream Frosting... can you say 'YUM!'?:

Flourless Fudge Brownies

Yields: 12 large, 24 medium, or 32 two-bite mini brownies.

Bake time: 20-26 minutes

Ingredients:

1/3 C brown sugar
2/3 C granulated sugar
1 1/2 C cocoa powder (I use Fry's in the yellow can - you want to use good quality cocoa powder, unsweetened)
4 large eggs (or 5 medium size)
3/4 C extra virgin olive oil (vegetable oil works, too)
2 t ground coffee
2 t vanilla extract
2 C dark chocolate baking wafers - chopped roughly
Pinch of salt

Directions:

Preheat oven to 350 degrees. Lightly grease a 9x9 baking pan, or use parchment paper to keep brownies from sticking.

In a large mixing bowl, combine sugars and olive oil. Mix until well incorporated. Add eggs to sugar/oil mixture and mix well. Add vanilla and coffee grounds and mix everything together.

Add cocoa powder and salt to the wet ingredients. Using a spatula (or stand mixer on the lowest setting), mix together until batter is smooth and dark. Then, fold in chopped baking wafers.

Pour batter into prepared baking pan and bake 20-26 minutes.

Baking time will vary according to the pan you use, so absolutely check your brownies after 20 minutes, if they need more time, check every 2-3 minutes until a toothpick or knife inserted in the middle comes out clean.

Allow to cool 5 minutes, then remove from pan and transfer to a wire cooling rack. Allow to cool completely if you want to frost the brownies, otherwise they are amazing when they are still warm.


*You could easily add chopped walnuts or pecans, fold into batter at the same time as the chocolate.
*You could also add a flavored extract like peppermint. I didn't because I knew I was going to frost these bad boys with Peppermint Buttercream:

Peppermint Buttercream Frosting

Yields: 2 C

Ingredients:

1/2 C unsalted butter, room temperature
1 1/2 C powdered sugar
1 1/2 T heavy cream
1/2 t peppermint extract

Directions:

In a large mixing bowl, whip butter until light and fluffy (6-9 minutes in a stand mixer, longer if mixing by hand).

Add in powdered sugar, cream and extract, mix until well combined and texture is light and fluffy. Optional: Once brownies/cake/cupcakes are frosted, you could sprinkle the tops with crushed peppermint candies for a cute and pretty touch.

The flavor of the extract will intensify as it sits - it is best to make the recipe the night before you use it.

*Unlike vanilla extract, peppermint has a very strong flavor. I probably used a bit more than 1/2 t (3/4 t - 1 t). However, you always want to use less when you start with mint extracts and make sure you taste your work as you go. It is much easier to add flavor to a recipe than to remove it, and it would be even worse to have to scrap an entire recipe because it came out tasting like Listerine.

*There are different types of mint extract available: Mint, Peppermint (used in this recipe), Spearmint, etc.

*If you eliminate the extract in this recipe, you have a simple, plain Buttercream frosting for any recipe. You could also swap out the peppermint flavor for something different, like almond, coffee, or orange.

Enjoy and Bon Appetit!